Introduction
Probably, most of you have heard about Raspberry Pi, which is an organization that produces a wide range of development board that are used in both education and industrial work. Among these boards, the Raspberry Pico is a compact, powerful and extremely budget friendly board in the current market. Also, it allows you to write programs in Python (using MicroPython) and C/C++ making it a good entry point for those who are interested in embedded programming.
Even though we can write programs for this board with Python, I will be using C/C++ for this and future guides. With C/C++ we can create programs that runs with very low latency and make full use of the resources and capabilities of the Pico.
What’s In this Article.
This article serves as a foundation for the future Pico-based articles and gives you a clear guidance for setting up the Pico C/C++ development environment, creating your first project, building it and flashing the compiled program onto the Raspberry Pi Pico.
Setting up the IDE.
To build on Pico we need the official C/C++ SDK for Raspberry Pi Pico. Even though the SDK can be downloaded and installed separately, and used with any IDE you like, to make this article short and beginner-friendly I’ll use the official Raspberry Pi Pico extension for Visual Studio (VS) Code which automatically download and configures the SDK, compilers, path and the build system for you.
To install the Pi Pico Extension, follow the steps below.
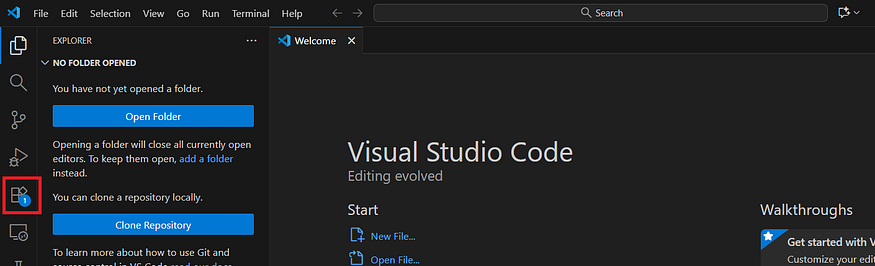
- Open VS Code
2. Search for “Pi Pico” and choose the official Raspberry Pi Pico extension by Raspberry Pi.
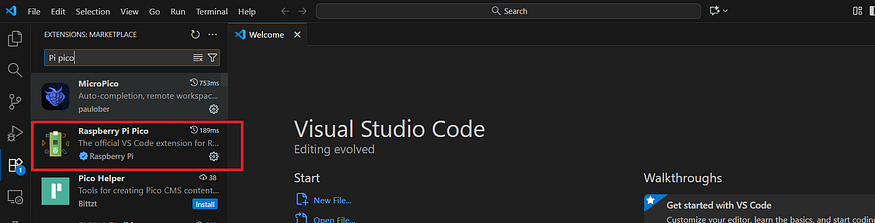
3. Install the Extension

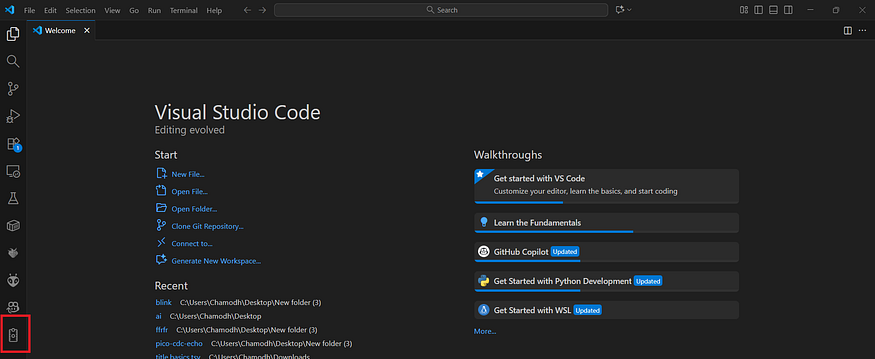
After installing the extension you should be able to see a little Raspberry Pi Pico board icon in your extension icon list.
Making your First Blink Program
As Promised, we will be creating a blink example to run on your Pico as a beginner step. Here is the step-by-step guide on how to do that.
- Open VS code and click on the Pi Pico extension’s icon.
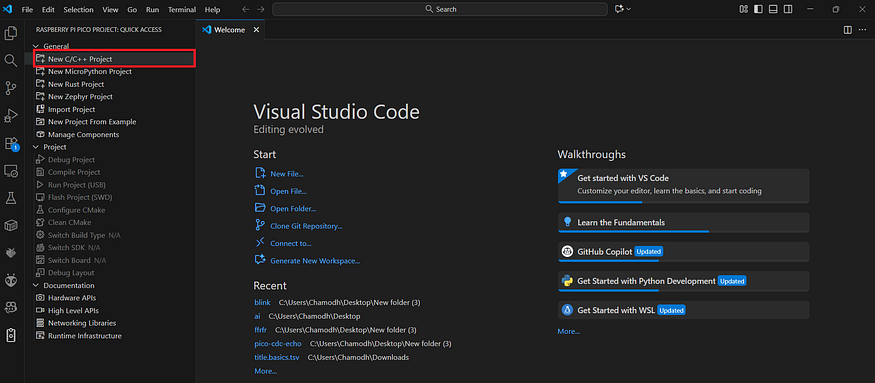
2. Click on “New C/C++ Project”
3. Click on “Example”

4. Search for the example “blink” and Set the board as Pico. (I select Pico as it’s the version of my Raspberry Pi Pico board for this project. If you use a different version of the board like Pico 2, set the board type accordingly)
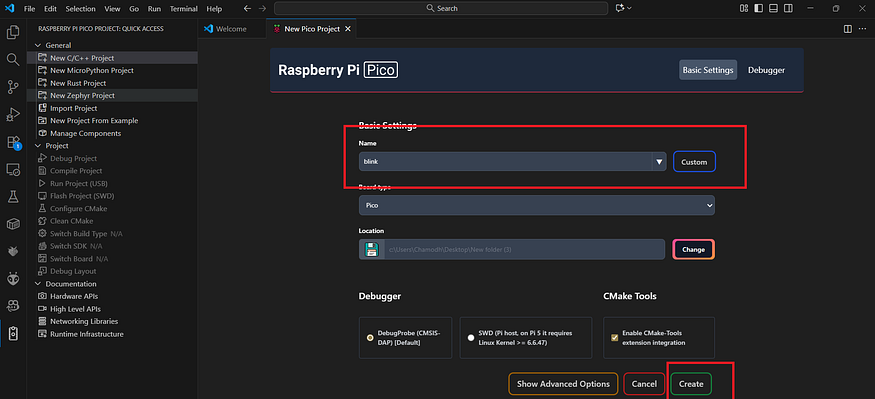
5. And hit the “Create” Button.
After that a new VS code window will pop up and might ask you to select a compiler kit. In such case Select “Pico” from the list and continue. If you missed that prompt, you don’t have to worry because you will see it again when you try to compile the project.
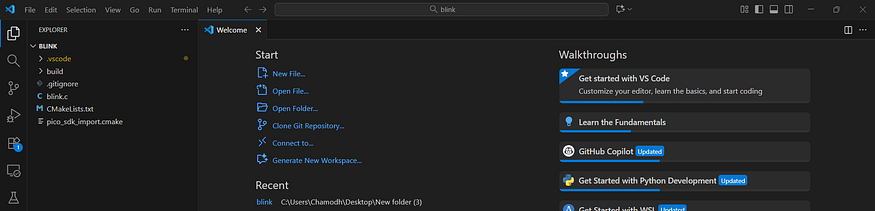
The extension create this boilerplate code which handles SDK imports and all the compiler links for us. For this example we don’t have to change any of these files.
Now, it’s time to build. Go to the Pico extension icon in VS Code and hit this Compile Project button to compile our code.

and it will start building the binary file for our blink.c code.
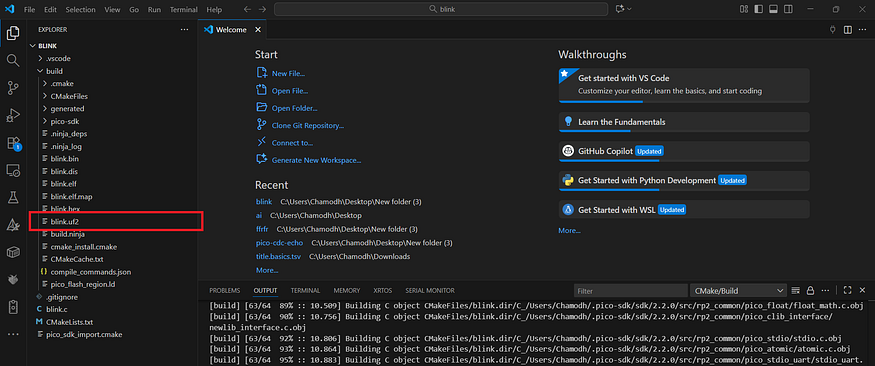
If your build is successful you will see a line similar to the following in your VS code terminal.

And there should be a file named “blink.uf2” in your “…project/build/” directory.
Now, it’s time to flash this .uf2 file which is the binary that we created for our blink project to the Pi Pico’s memory.
To do that, we have to follow an interesting method. You have to plug your pico’s USB cable to your computer while keeping the BOOTSEL button of the Pi Pico board pressed.
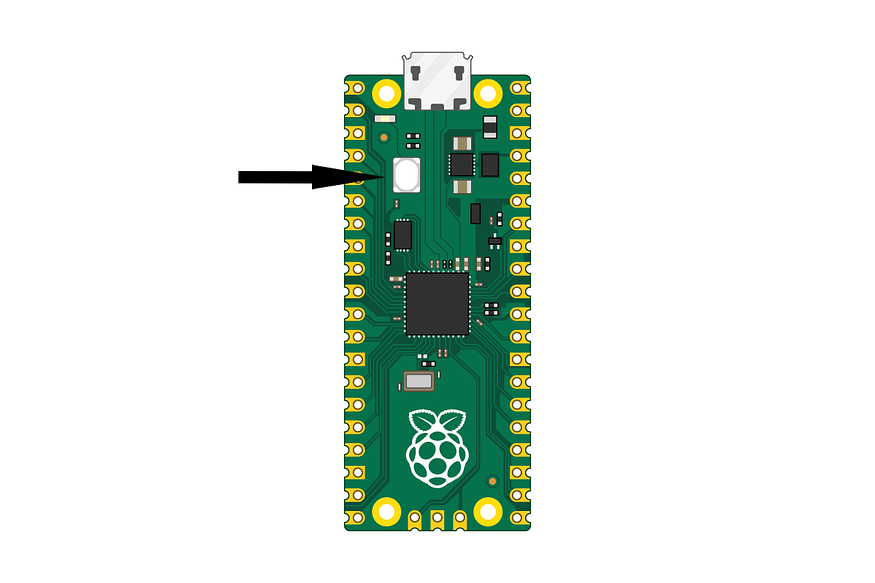
When you do that, your computer should recognize the board as a USB mass storage device meaning it is in its bootloader mode.
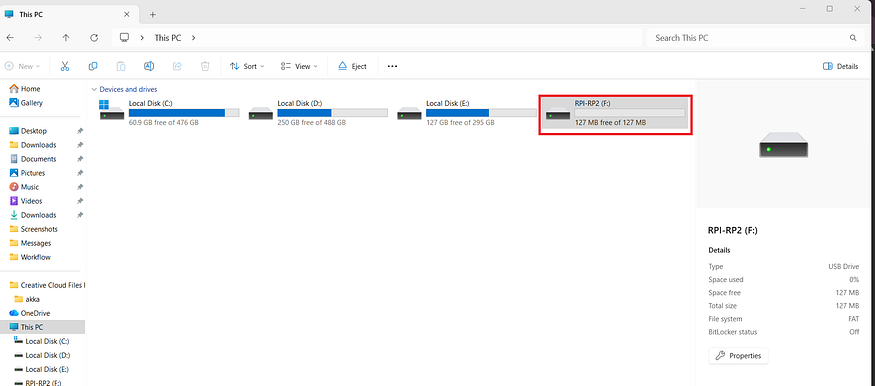
Now what we have to do is to, copy the .uf2 file we made into that drive (i.e. the Pico)
As soon as the file is copied, the Pico exits from the bootloader mode and starts to blink the built in LED with a delay of 250 milli-seconds.

Changing the Blink Speed
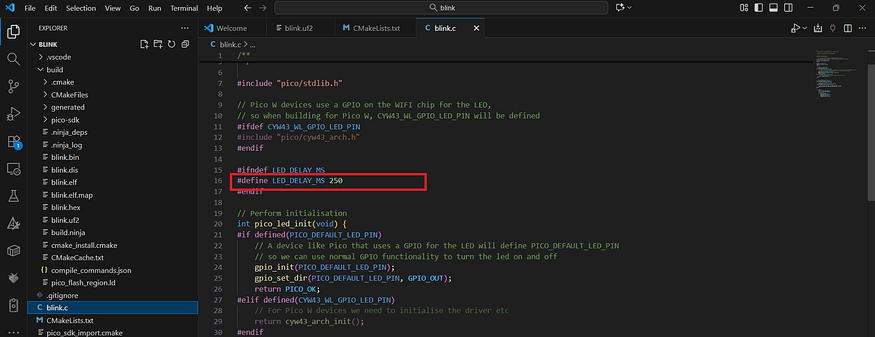
Now, let’s change the blink delay of the LED and re-flash it onto the board.
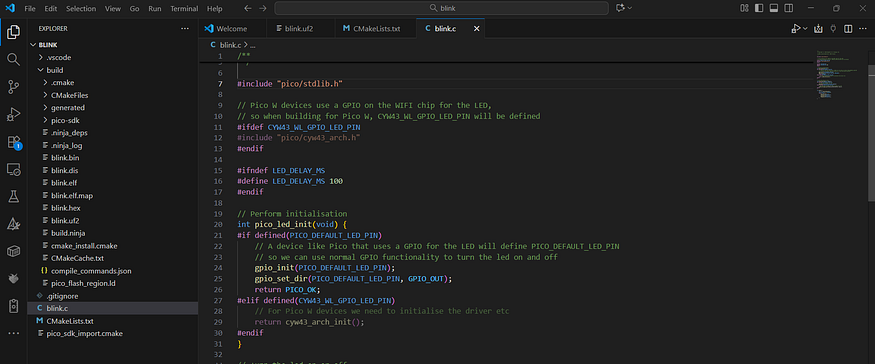
To do that, open the blink.c file in the project directory and open it in a code editing tab in VS code and edit the line to whichever value you like and save it.
If you scroll a little bit down, you can see how that value is used to blink the LED.
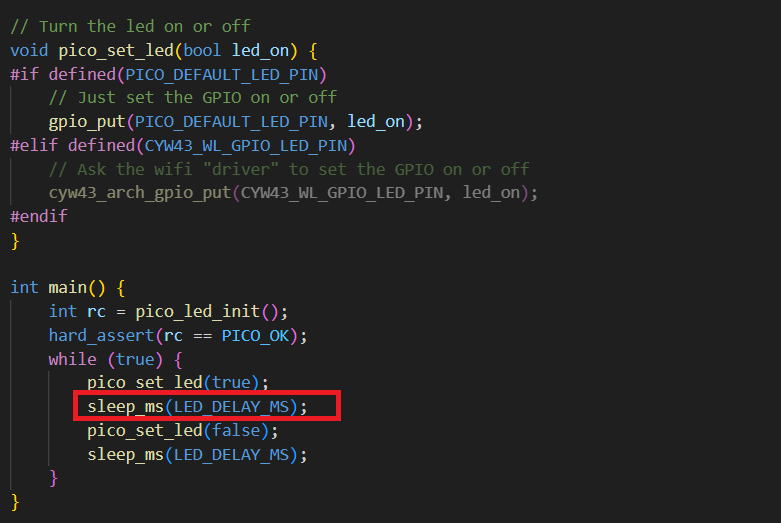
The main function has this infinite loop that call pico_set_led() function after LED_DELAY_MS milli seconds to turn the built-in LED on and off.
Now you have to follow the compiling instructions I described above to compile this project and get the .uf2 file. After that, you can flash it onto the board by following the same method we used above.

So, we have successfully setup the C/C++ SDK for Raspberry Pi Pico, compiled the blink example, edited it and flashed it onto the board.
What’s Next
In the next article I will teach you how to create your own USB devices using this amazing, super inexpensive development board making use of its native support for USB protocols.
If you faced any issues while following this guide, feel free to reach out to me on LinkedIn: https://www.linkedin.com/in/chamodhk/
This article was also published on the Rotaract Mora blog and on Medium:
Thank You!!